The original Distressor stereo link implementation used a summing and phase detection method which allowed stereo image shifting. “Image shifting” occurs when the interchannel balance (the relative volume between Left and Right channels) changes during compression. Although known for its phase correction, and its “thickening” on open room mics and other stereo sources, this approach has sometimes been a problem on stereo program material where the producer/engineers want to maintain absolute left/right balance at all times.
With the new “Stereo Image Link” option, the Distressor user now has three link options – the original “phase” link, the new Image Link and the combination of the two, phase and image linking. This has never before been offered on any compressors or limiters. There can be very slight differences in the metering between the two units. Due to the high resolution of the Distressor’s metering, 1/10th dB can make an LED on one unit go on or off earlier than the other unit’s. Also, don’t readjust knob alignment – the output pots especially. They are often offset around “0” to allow for “dead spots” at the lower extremes.
How to use the new Stereo Image Link Option for the first time
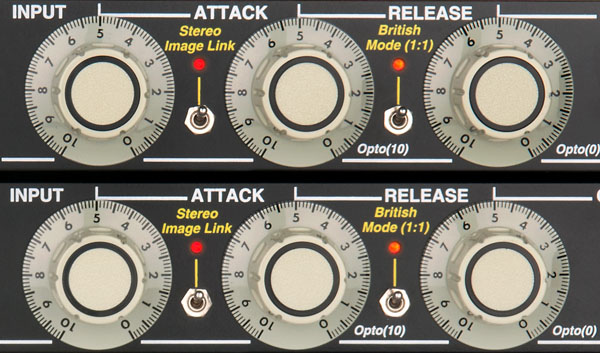
You must now use two stereo phone plugs in the link cabling. This means standard TRS phone plugs. They are supplied when you purchase the option. Plug one unit’s Link Out to the other’s Link In, and vice versa. Both units must have the “Stereo Image Link” switch on (both switches should be in the up position and the LEDs should be lit). The engineer must still match the units’ front panel controls usually, but the units will now always match in their gain reduction amount – eliminating image shift. The most important thing the user must do is match the left and right input and output levels. If no change is going to be made to the left/right balance, using a tone to set the left right I/O levels is very direct and useful. See below.
Tips
Setting I/O levels – It is suggested that you set both units to their general expected settings, with Stereo Image link engaged, apply an identical tone to both Distressors, and adjust the inputs nearly the same, then “tweak” the outputs so that the output levels are identical. Use the meters on your board or recorders. This will ensure that the interchannel levels remains unchanged. Also, with the new linking, it is not as critical to match either the input or outputs, since the gain reduction between the two channels is locked, and therefore once the overall throughput levels are matched, they will remain that way. However, the units can respond more to the louder channel if the input levels are not matched closely.
Tricks
* First, there is no limit to how many units can be linked – in theory. However, you must avoid long link cables since they will cause noise and degradation of operation. To wire up more than two units, go from the link output of the 1st unit’s link to the next units link input, then take that units link out to the next ones input etc. Finally, take the last units link out and feed it back to the first units link in. Again, your must use stereo phone plugs for the new “Stereo Image Link” to work.
* Try putting the lower unit into 1:1 mode with attack and release on 10. Then still matching the I/O levels, use the upper unit to select ratio and attack/release times. This will allow a longer attack time then otherwise available, since the top unit must drive both units timing circuitry. The down side is that the units will only respond to the top units signal, unless the original link is engaged (see below). There are a few well known compressors that have a master/slave mode that only looks at the “master units” audio – so this is not unheard of. You may switch the units and have the bottom one control the top unit (which is in 1:1 mode). Also, using the original link will sum both channels partially, so that there is some response to the “slave” units audio. This longer (slower) attack time is sometimes very useful on program material – a la SSL type compression.
* By not matching the units front panel controls – whole new ratios can be obtained. For instance, putting the left channel on 2:1 and the right channel on Nuke (pretty radical but..), then setting the left and right levels differently, you can get a combination of two ratio curves. Usually the lowest attack/decay settings will override the higher settings, i.e. if one channel has the attack set to 10 and the other to 3, the units will generally react at the faster 3 setting.
* If for some reason no TRS stereo link cables are available, one may use a regular guitar cable to enable the new link. But you only insert the cable part way into the rear Link connectors – so that only the ring is in contact with the tip of phone plug. The normal EL8 link will be sacrificed, however, since it relies on the tip of the link connectors to be connected. It is probably best not to put the unit in normal link (in the Det area) since it will make the unit operate with more distortion without the tip connections – then again this mite be the perfect spice for your gumbo!